Inspection equipment details
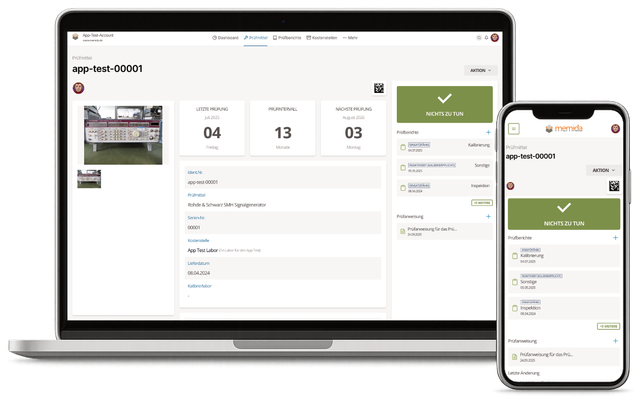
Fig. 1: Inspection equipment details
The top section displays the most important information about the device.
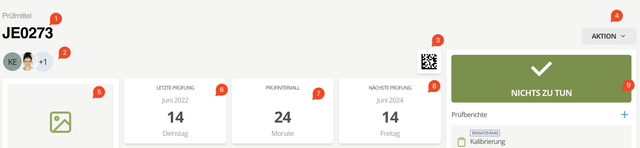
Fig. 2: Details header
- ID no. of the device
- Assigned users – these users are allowed to edit the device
- 2D code – this DataMatrix code uniquely identifies the device. Print it on the label to scan it with the Memida app and open the details instantly.
- Action button – provides shortcuts to:
- Add inspection report
- Edit device
- Download the master data sheet (PDF)
- View the device history
- Archive the device
- Image(s) of the device
- Date of the last inspection
- Inspection interval
- Next inspection date
- Device status
Hotkeys
You do not always need to open the Action menu. The following keyboard shortcuts are available on this page:
- Windows
- macOS
- Linux
| Action | Hotkey |
|---|---|
| Add | Ctrl + Shift + A |
| Edit | Ctrl + Shift + E |
| History | Ctrl + Shift + H |
| Action | Hotkey |
|---|---|
| Add | ⌃⇧A |
| Edit | ⌃⇧E |
| History | ⌃⇧H |
| Action | Hotkey |
|---|---|
| Add | Ctrl + Shift + A |
| Edit | Ctrl + Shift + E |
| History | Ctrl + Shift + H |
Description | notes
Keep a complete timeline by documenting repairs and maintenance in the Description | Notes section. Entries appear in reverse chronological order, giving you a running history for each device.
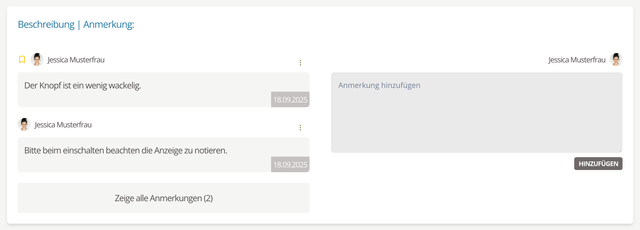
Fig. 3: Comments
Open the comment menu via the three dots  . Choose Pin (1) to pin a comment.
Tip: Pinned comments show an icon next to the avatar (2).
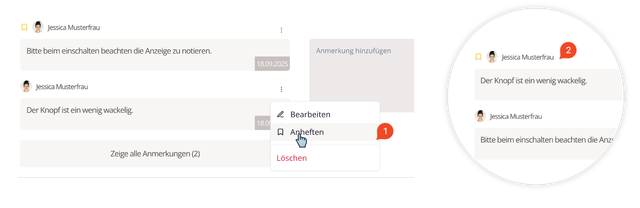
Fig. 3.1: Pinned comment
Inspection reports
Click the plus icon on the right to add a report. Click a report to open it. When more than three reports exist, Memida opens them in a compact window.
Inspection instructions
Click the plus icon on the right to add an inspection instruction. Click an instruction to open it.
Attachments
Open the action menu and choose Edit (1), or use a hotkey to enter edit mode. Upload any supporting documents (2) by dragging files into the drop zone or clicking the center.
You can delete files (3) or assign types (4) to categorize them.
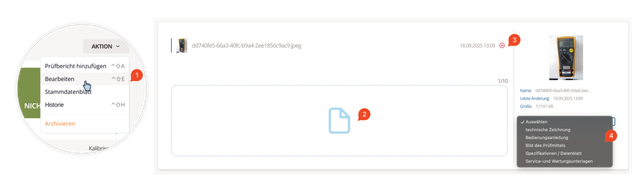
Fig. 4: Add attachments
Tip: Images tagged as Image of the inspection equipment appear in the image section at the top left.