Getting Started with Memida
This page will guide you in approximately 15–30 minutes from an empty account to a functional basic configuration – with your first test equipment, label, location, and documentation. The goal is not completeness, but a clean, practical start.
For whom? Quality management, maintenance, occupational safety, laboratory management, and administrators.
1) Prerequisites
For the first steps to work smoothly, the following points should be met:
- Browser: Current version of Chrome, Edge, Firefox, or Safari.
- Access: User account with appropriate roles and permissions (at least Edit for test equipment).
- Optional – Label printing: A label printer for the label assistant (any label formats, e.g., small-format industrial labels).
- Optional – Mobile work: Memida App (iOS/Android) for scanning DataMatrix codes and mobile access to test equipment.
2) Basic Configuration (one-time setup)
In this step, you create the master data on which all test equipment will be based. This reduces duplicate work and ensures consistent naming.
-
Users and Roles
- Create responsible persons (QM, maintenance, laboratory, purchasing, etc.).
- Assign roles: Who may create, edit, approve, or archive test equipment?
- Optional: Add functional mailboxes (e.g., qm@…) for reminders.
-
Sites and Storage Locations
- Record company sites (e.g., plants, branch offices, laboratories).
- Mark buildings or areas on the map.
- Define storage locations (e.g., "Goods receipt", "Internal calibration lab", "Service vehicle 1").
-
Calibration Laboratories / Service Providers
- Enter internal and external laboratories as master data.
- Add contact information and contact persons (email, phone, customer number if applicable).
- Optional: Record typical services or test types as notes.
-
Device Master Data
- Create manufacturers, model/type designations, and categories.
- Where available, adopt from existing suggestions to avoid duplicates.
- Define meaningful groupings (e.g., "Torque wrenches", "Test gauges", "Temperature sensors").
-
Custom Fields
- Create individual fields relevant to your company, e.g.:
- Area of use (production, laboratory, goods receipt, etc.)
- Criticality / measuring equipment class
- Reference to standards, specifications, or internal documents
- Decide which fields are mandatory and where free text makes sense.
- Create individual fields relevant to your company, e.g.:
-
Import the Inspection Equipment Inventory
- If Excel, CSV, or ERP lists already exist, onboarding can intentionally start with the inspection equipment import.
- Upload the import file, map columns, and review rows; invalid records are shown before they are saved.
- Existing master data such as cost centers, sites, storage locations, manufacturers, equipment types, and calibration labs should be checked first so the transfer runs cleanly.
3) Your First End-to-End Workflow (approx. 10 minutes)
The following process (expandable) represents the typical path of a new test equipment – from creation to the first documentation.
The import is an intended starting step when inspection equipment inventories already exist in spreadsheets. Use it before or instead of manual single-item creation, then add only new individual items afterwards.
Step A – Create Test Equipment
- Select New or Add in the test equipment list.
- Enter master data:
- Test equipment designation
- Internal ID number
- Serial number (if available)
- Cost center or organizational assignment
- Activate Calibration (if relevant) and specify:
- Calibration interval (e.g., 12 months)
- Responsible calibration laboratory / service provider
- Set Site / Storage location:
- Select site
- Mark building or area on the map
- Select storage location or create new one
After saving, the digital test equipment file with master data and basic status is ready.
Step B (optional) – Generate and Print Label
- In the label assistant, select a suitable template or create a new one (size, content, DataMatrix code placement).
- In the test equipment list, mark the new test equipment → Bulk Actions → Labels.
- Select template → Generate PDF → Send to label printer.
- Attach label to device. The DataMatrix code links the physical test equipment with its digital file in Memida.
Step C (optional) – Scan and Check Details
- Open Memida App on your smartphone.
- Scan the DataMatrix code of the just-labeled test equipment.
- The test equipment detail page opens:
- Status and next due date
- Location and cost center
- Previous history (initially empty)
This completes the full path "device in system" → "device on site" once.
Step D – Add Documentation
- Upload and assign a current test report (e.g., calibration certificate as PDF).
- Store the associated test instruction – e.g., internal test procedure or standard reference.
- Use Comment / Description to document safety-relevant notes or restrictions.
- Upload images and classify as "Image of test equipment"; they appear in the header of the detail page.
After this step, the first test equipment is fully documented and audit-ready.
4) Working with Lists, Filters and Exports
Once multiple test equipment are in the system, lists become the central work tool.
- Show and hide columns to adapt the list to your daily work.
- Combine filters and search, e.g.:
- Status = "Calibration due"
- Site = "Plant 2"
- Category = "Torque wrenches"
- Export filtered lists as CSV, Excel, or PDF – for audits, internal reviews, or meetings.
5) Managing Due Dates and Escalation
Memida calculates due dates automatically based on stored intervals.
- Interval and next test date are maintained per test equipment.
- Due date status is visible in the list and detail view (e.g., "in preparation", "due soon", "overdue").
- Pre-due notifications help schedule tests on time.
- Email reminders and escalation rules support systematic processing of overdue test equipment.
6) Roles, Rights and Quality Assurance
Finally, it's worth reviewing the quality of recorded data and the distribution of responsibilities.
-
Roles and Rights
- Define roles, e.g., Read, Edit, Approve, Administer.
- Ensure critical actions (e.g., archiving, changing intervals) can only be performed by authorized persons.
-
Mandatory Fields and Default Texts
- Configure important master data as mandatory fields to avoid gaps.
- Use default texts to enforce consistent designations and classifications.
-
History
- Every action on test equipment (create, modify, status change, archive) generates a revision-safe entry.
- In audits, this allows tracing who made or approved which change and when.
After these steps, your company has an initial, consistent foundation in Memida – with real test equipment, clear responsibilities, and a complete example process from creation to documentation.
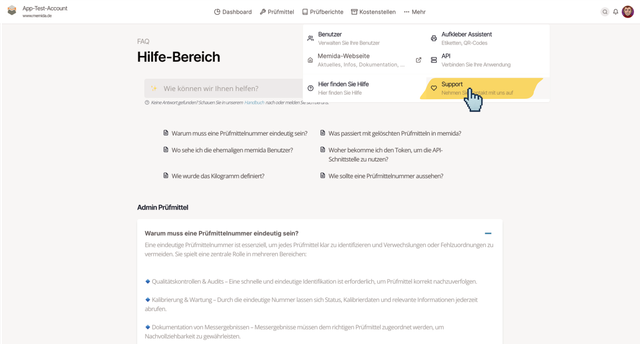
Support for Open Questions
First, check our help section to see if your question is already answered there. Many typical topics – from first steps to special features – are described step by step.
If questions remain, you can reach our support team directly via the in-app service. Describe your concern as specifically as possible (area, affected test equipment) so we can help quickly.
Alternatively, you can send us an email to kontakt(at)memida.de. Support is included in the subscription; there are no additional costs.
Online Session
Upon request, you can book an individual online demo session – for example, for team onboarding or to clarify specific use cases. Simply ask via a ticket or an email if needed; we will then arrange a suitable appointment together.